This post is intended to teach you how to use SpotiHub.
For more information about the project go to the SpotiHub blog post. Be sure to first check out the interactive tutorial in SpotiHub itself. This blog post is meant as reference when you finished the interactive tutorial.
Introduction
In this tutorial you will learn how to use SpotiHub to manage your own playlists and collaborate with friends to create playlists together. We will cover these topics:
- Overview of the SpotiHub Homepage
- Fork a playlist
- Create a new branch
- Create a commit
- Merge a branch back into main
- Open a Pull Request
These are the same topics, that are also covered by the interactive tutorial
Overview of the SpotiHub Homepage
Let’s first take a look at the SpotiHub homepage when you log in.
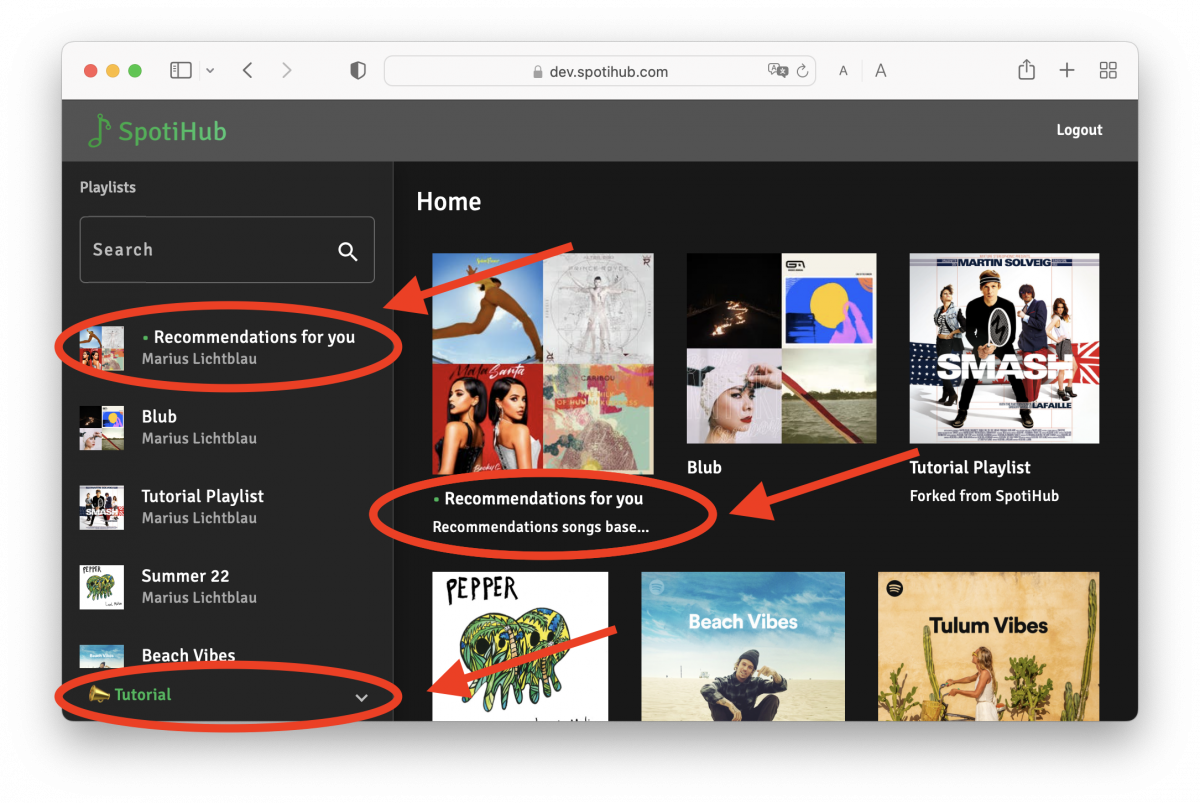
The SpotiHub homepage with tracked playlists and the tutorial
We can see an overview of all our playlists in two representations: big images in the main section and a searchable list on the side. If you have not completed the tutorial you should see in the bottom left corner. Also notice the green dot next to the first playlist. This dot indicates, that this playlist is tracked by SpotiHub. It appears once you create the first commit in the playlist. We can also see the difference between a tracked and an untracked playlist when we inspect the playlist details by either clicking one of the playlist covers or a playlist in the list. There is another difference, depending on whether it is your own playlist or the playlist of a friend, but we will look into that later.
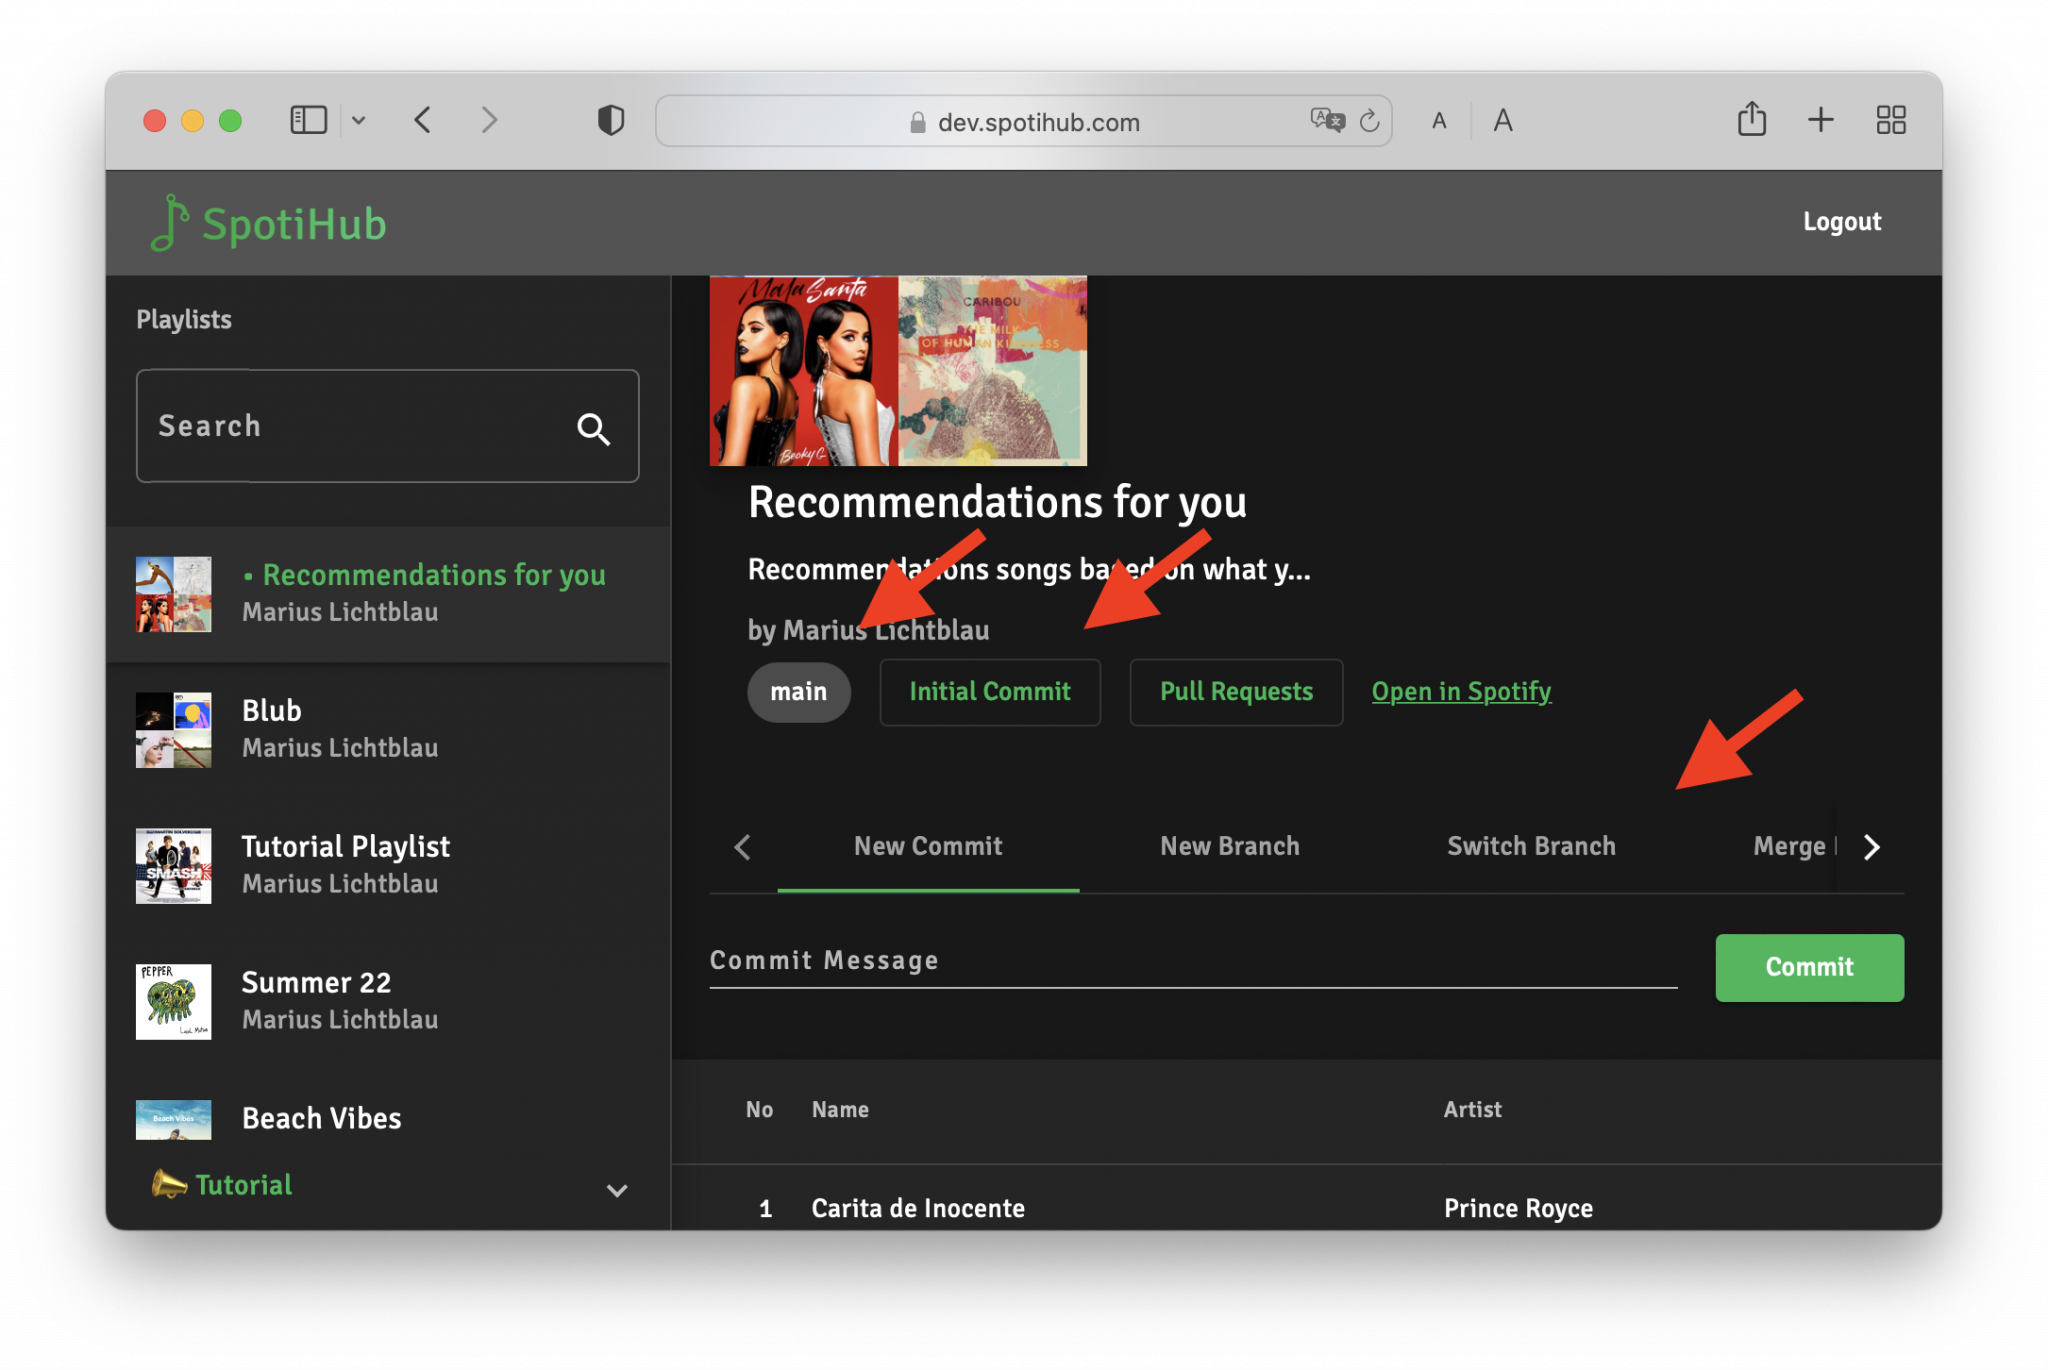
The untracked playlist only allows you to create your first commit. The tracked playlist shows you the current branch in the pill shaped button (main), next the most recent commit (Initial Commit) and an action bar. We will go through a typical usage scenario to learn more about each of these actions.
Forking a Playlist
In this example we want to work on a friends playlist, so we need to create our own fork. Our fork allows us to make changes to the playlist without affecting the original. Don’t worry, once we are happy with our playlist will propose an update to the original playlist!
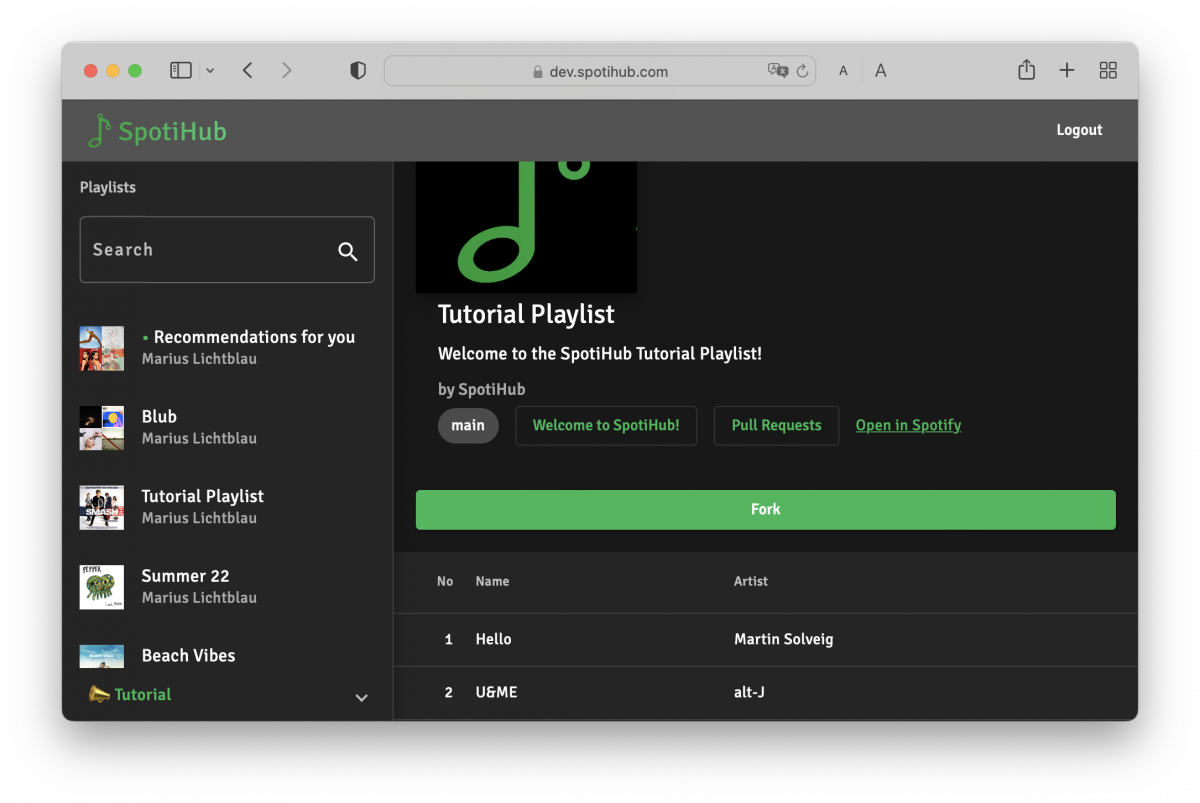
When we view the details of a friends playlist we can create a fork by clicking on the green “Fork” button by the playlist title. You will be redirected to your own fork automatically.
Creating a Branch
Next up we are going to create a new branch. Branches are essentially lightweight copies of our playlist where we can try out new songs. Once we are sure we want to permanently keep these songs we can merge them into our main playlist. If we are unhappy with our changes we can easily switch back to our main branch which is still in our previous state.
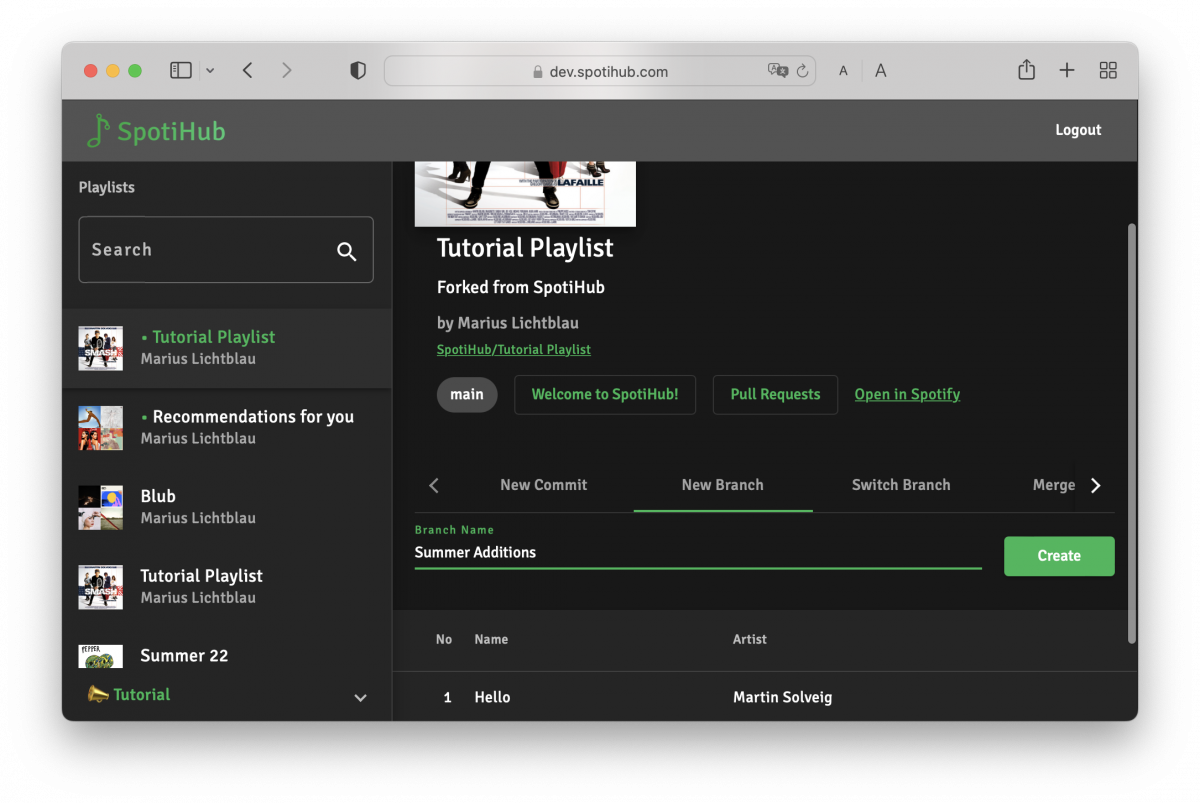
To create a branch we click on the “New Branch” button and enter a branch name in the input field. You can come up with any name you like, like “Summer Additions” or “Music from Vacation”.
Afterwards we click “Create” to create and check out the new branch. We can see the branch name in the pill shaped button by the playlist description.
Committing
Now it’s time to make some modifications to your playlist by adding new songs!
You add Songs on Spotify like you always do, either by opening the Spotify App on your phone or laptop, or on the web by clicking on the “Open in Spotify” Link under the playlist title.
SpotiHub doesn’t automatically refresh the playlist so we need to reload the page if we made any external changes.
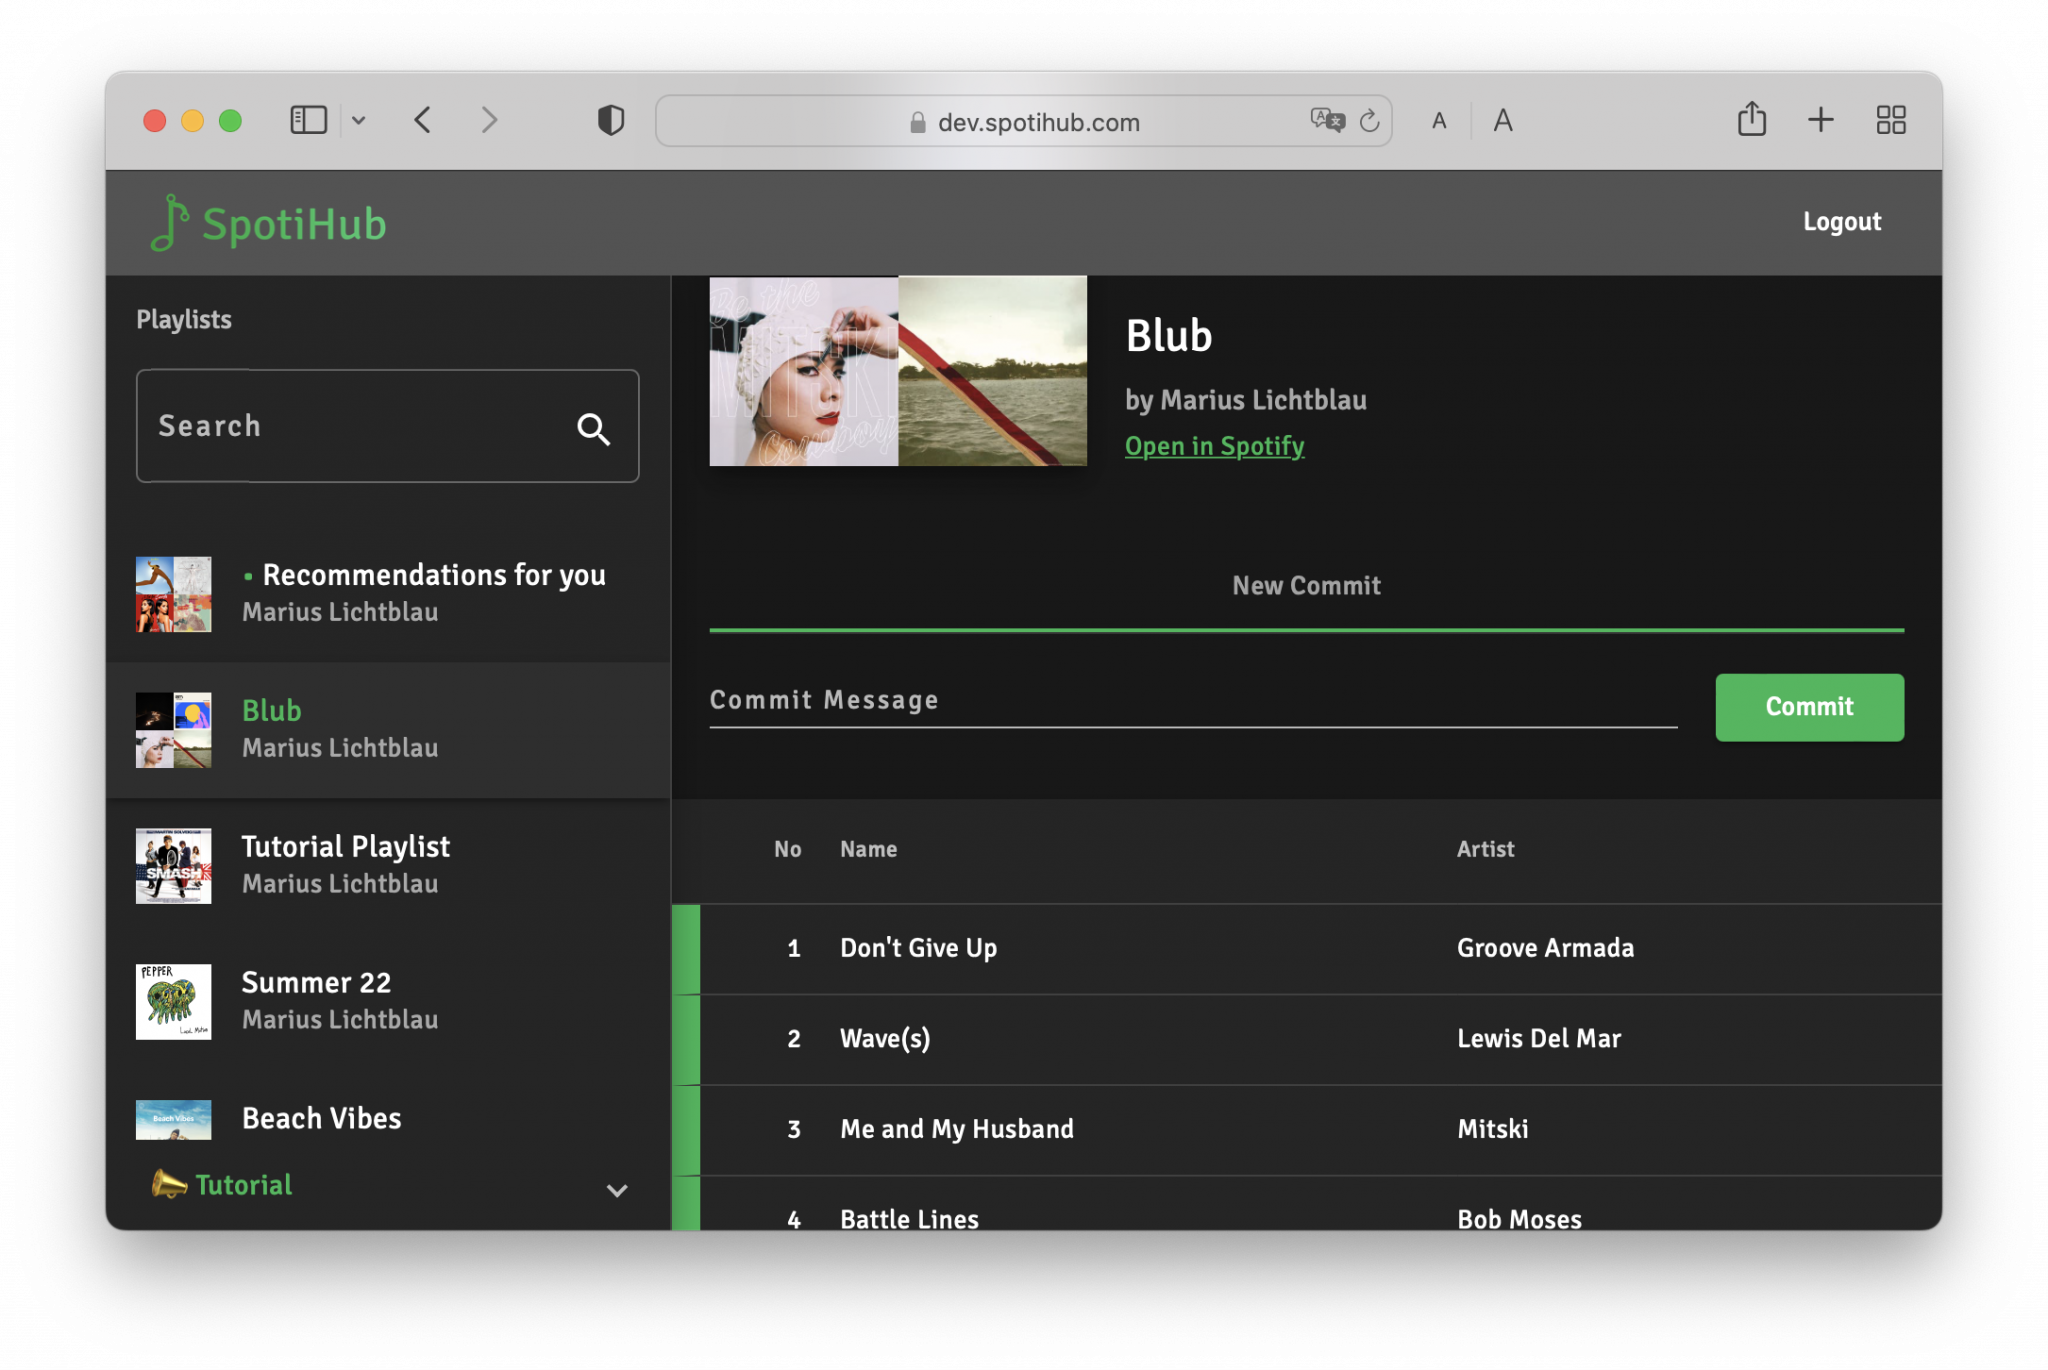
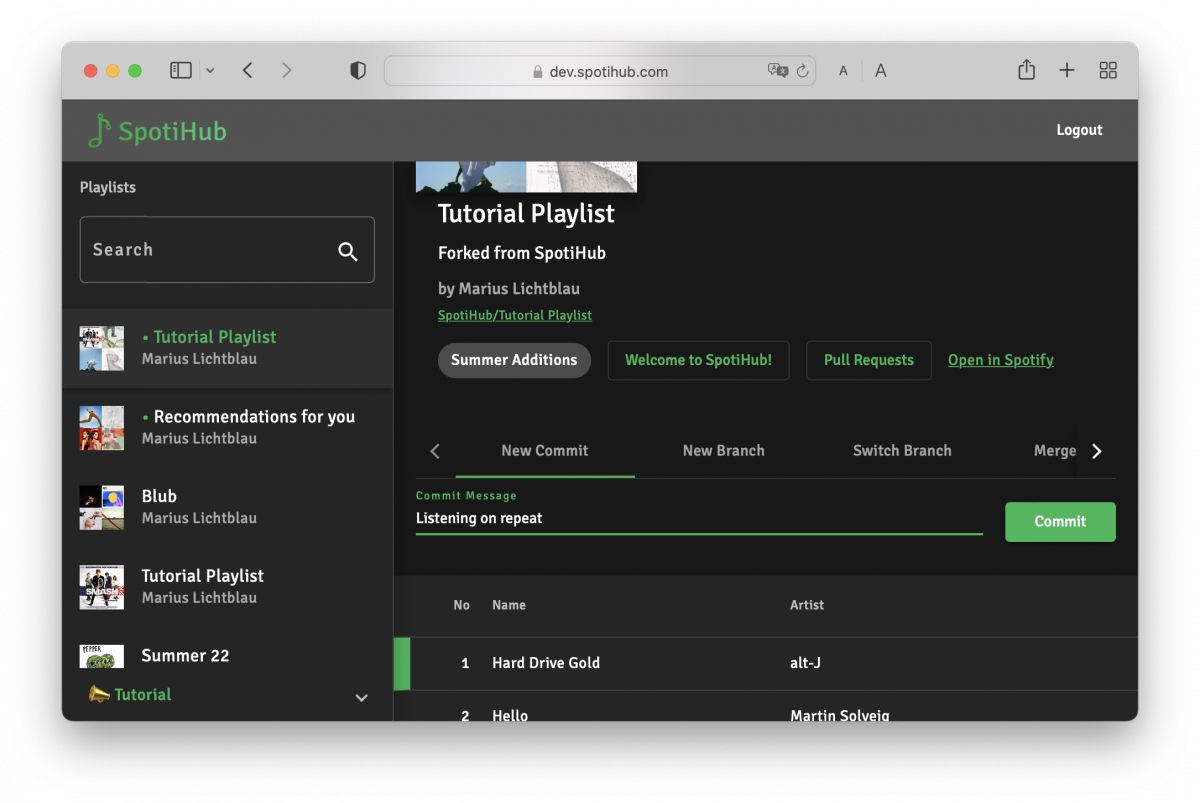
Afterwards we can see newly added songs in the list of songs with a green highlight on the left of the row. This indicates, that these song were newly added and have not been saved by a commit yet. If you remove songs they are highlighted in red.
Now it’s time to make our first commit. Commits are essentially save points for your playlists. You always need to create a commit when you switch a branch or create a Pull Requests, otherwise your changes won’t be saved. We must click on the “New Commit” tab and enter a commit message. This is the place where you can come up with creative ways to describe your changes to the playlist. For example: “Added my favourite song from when I was visiting Colombia :)”
Now we can press “Commit” to commit our changes. We can see that the green indicator next to the song disappears and our commit message shows up at the top of the page.
Merging a branch
As we mentioned before, the changes we made live on a separate branch of the playlist. This allows us to try out different music without changing our main playlist.
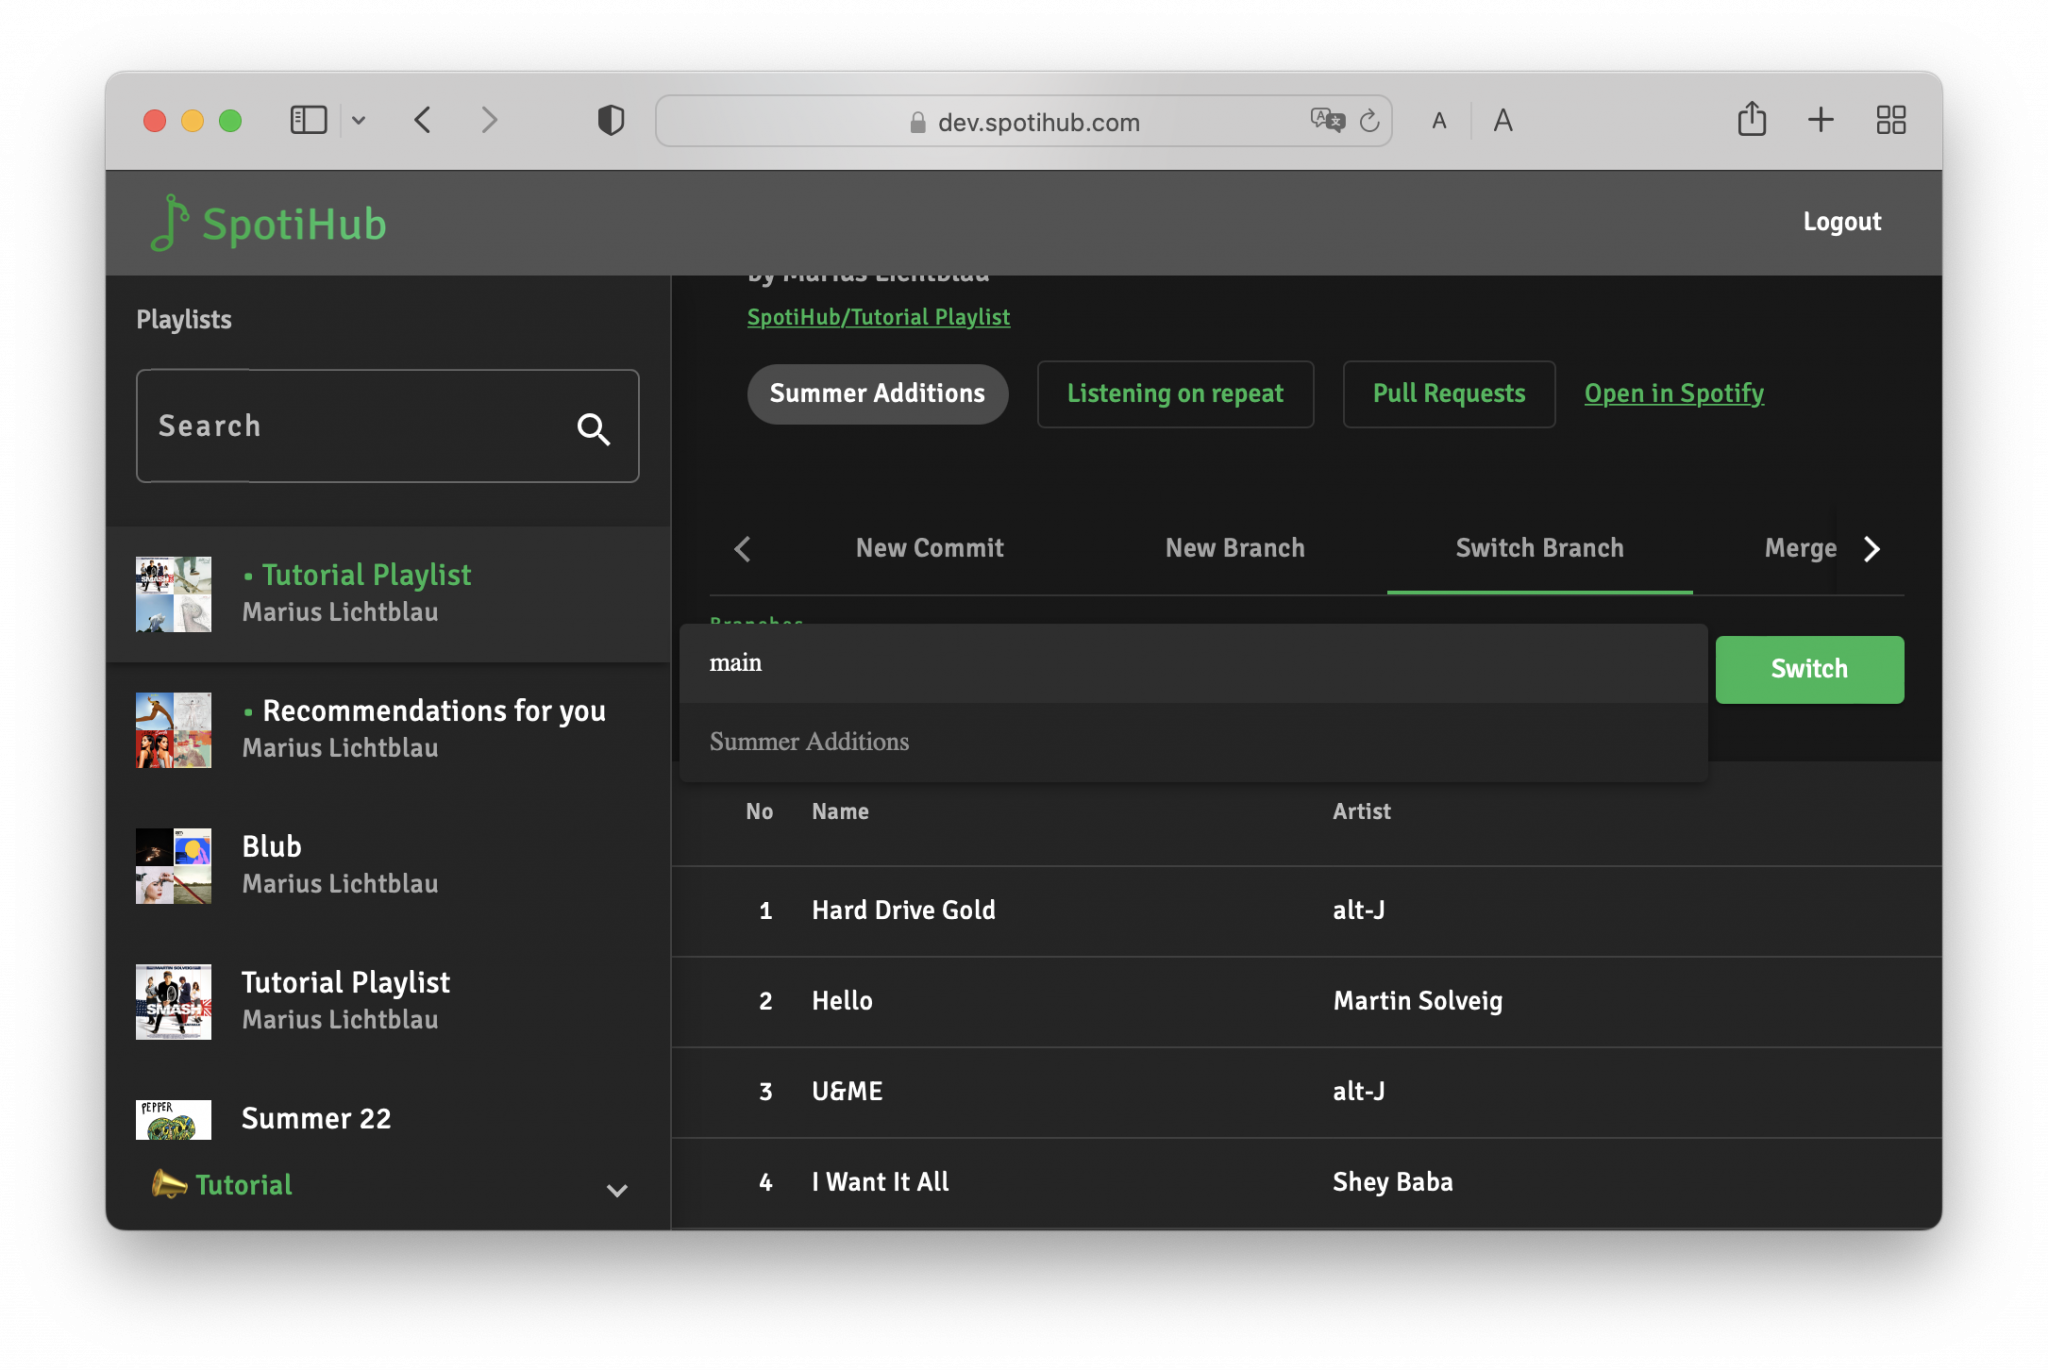
But when we are happy with our new additions, we need to merge these changes back to our main branch. To achieve this we first need to checkout the main branch. We can go to the “Switch Branch” tab and select the main branch. Then we click “Switch” to check it out. In your official Spotify App you will always see the version of the playlist, that is currently checked out.
Now our playlist looks like when we forked it, before we made any changes ourselves.
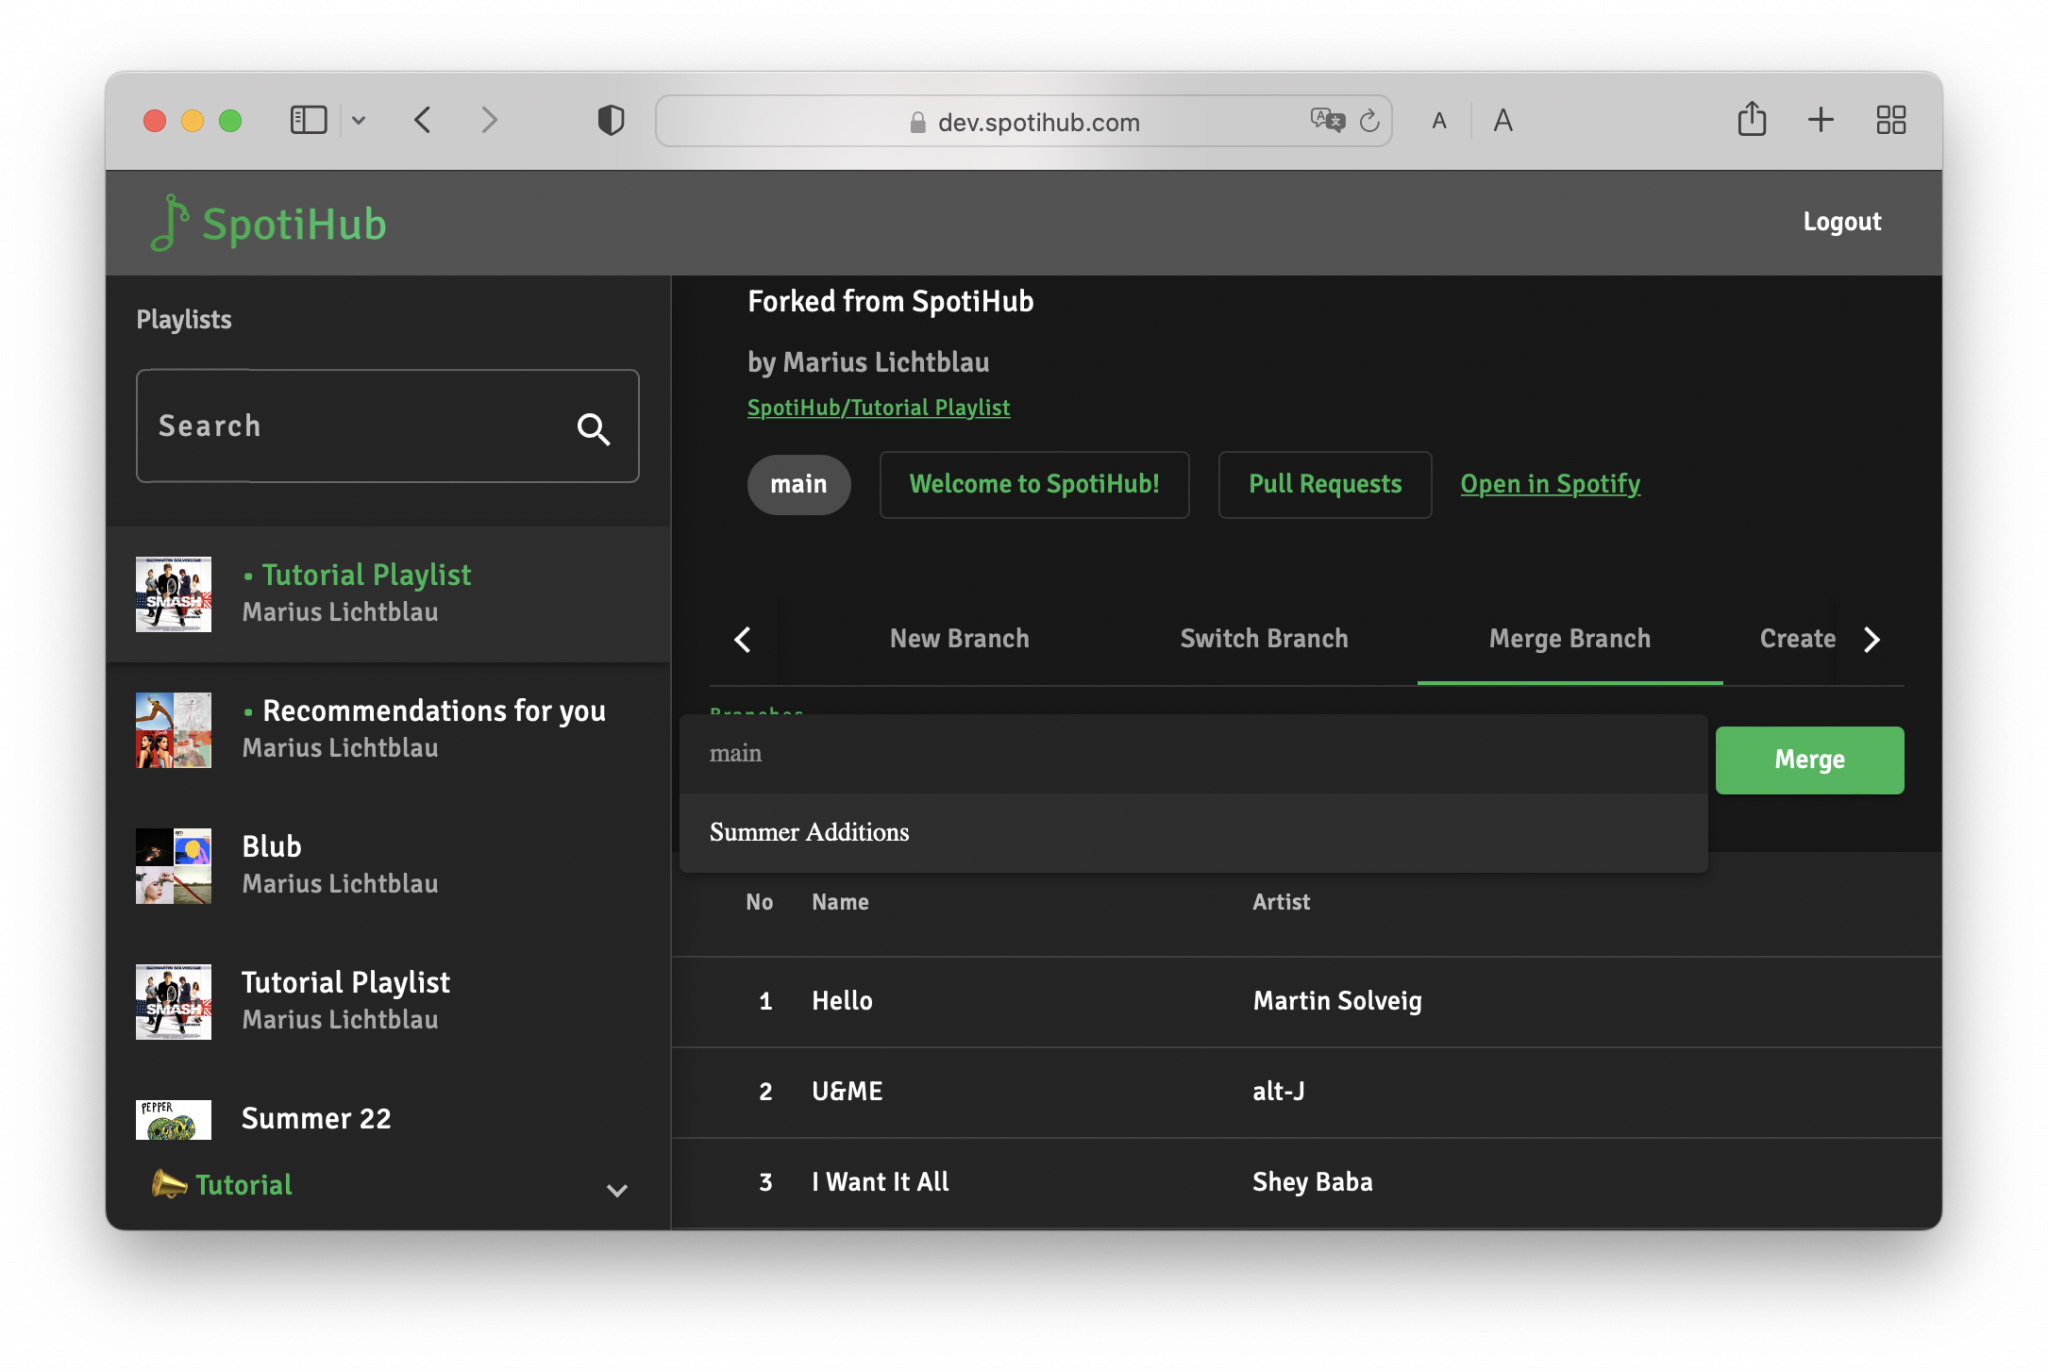
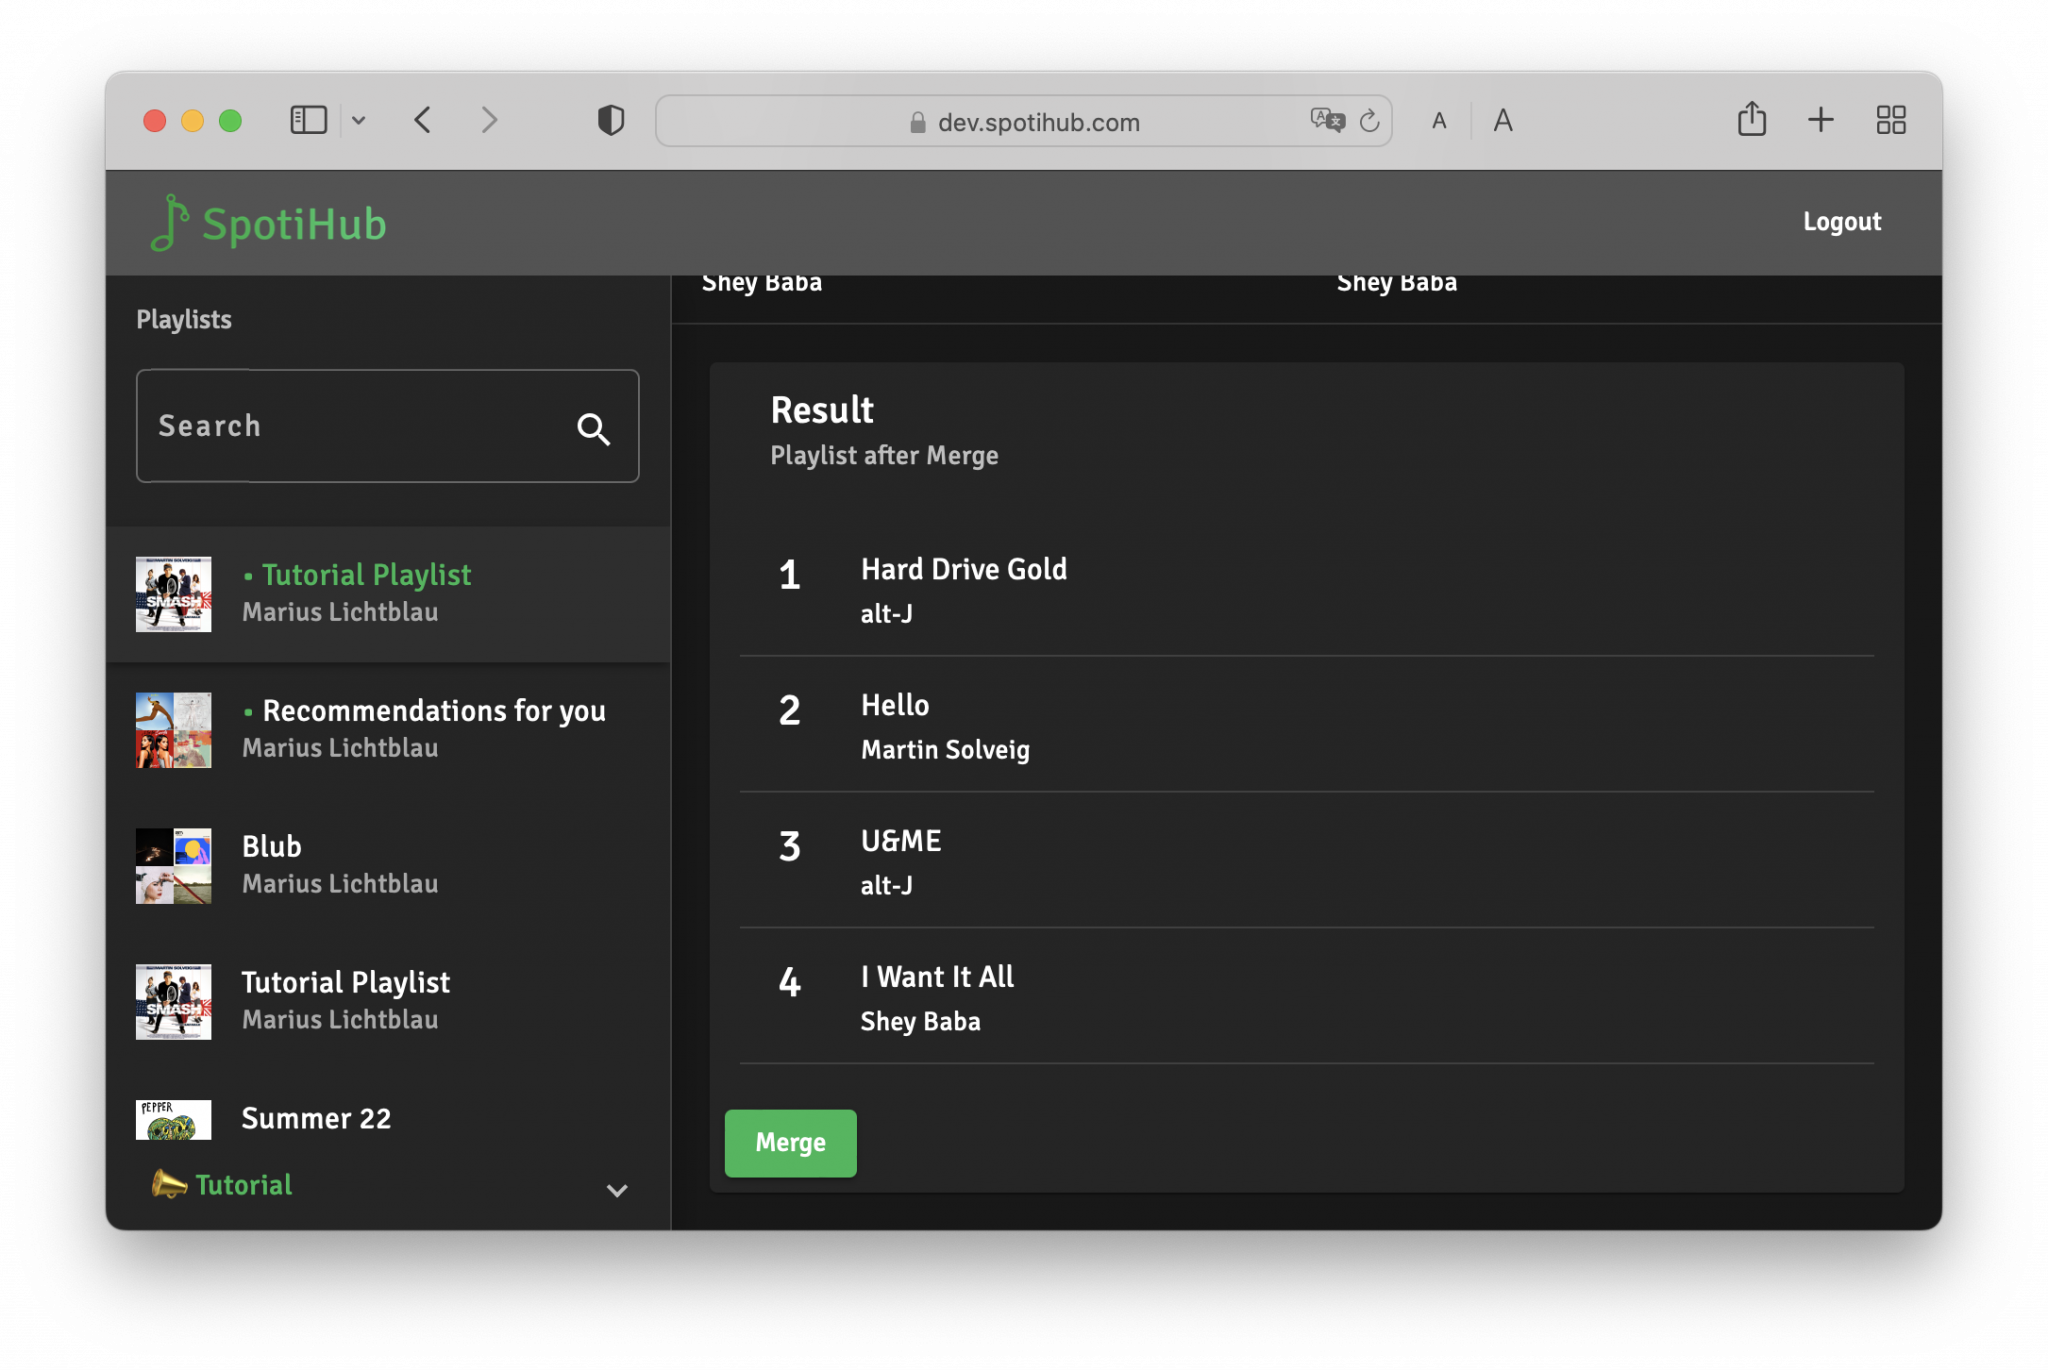
In order to see our changes we need to merge the branch we created earlier. We select the “Merge Branch” tab and select the name of the branch we created earlier. After click “Merge” we will be redirected to a new page.
Here we can see how our playlist will look once we’re done merging. Merging means that we add all the commits, so the save points, that we created on a different branch, on top of our current branch.
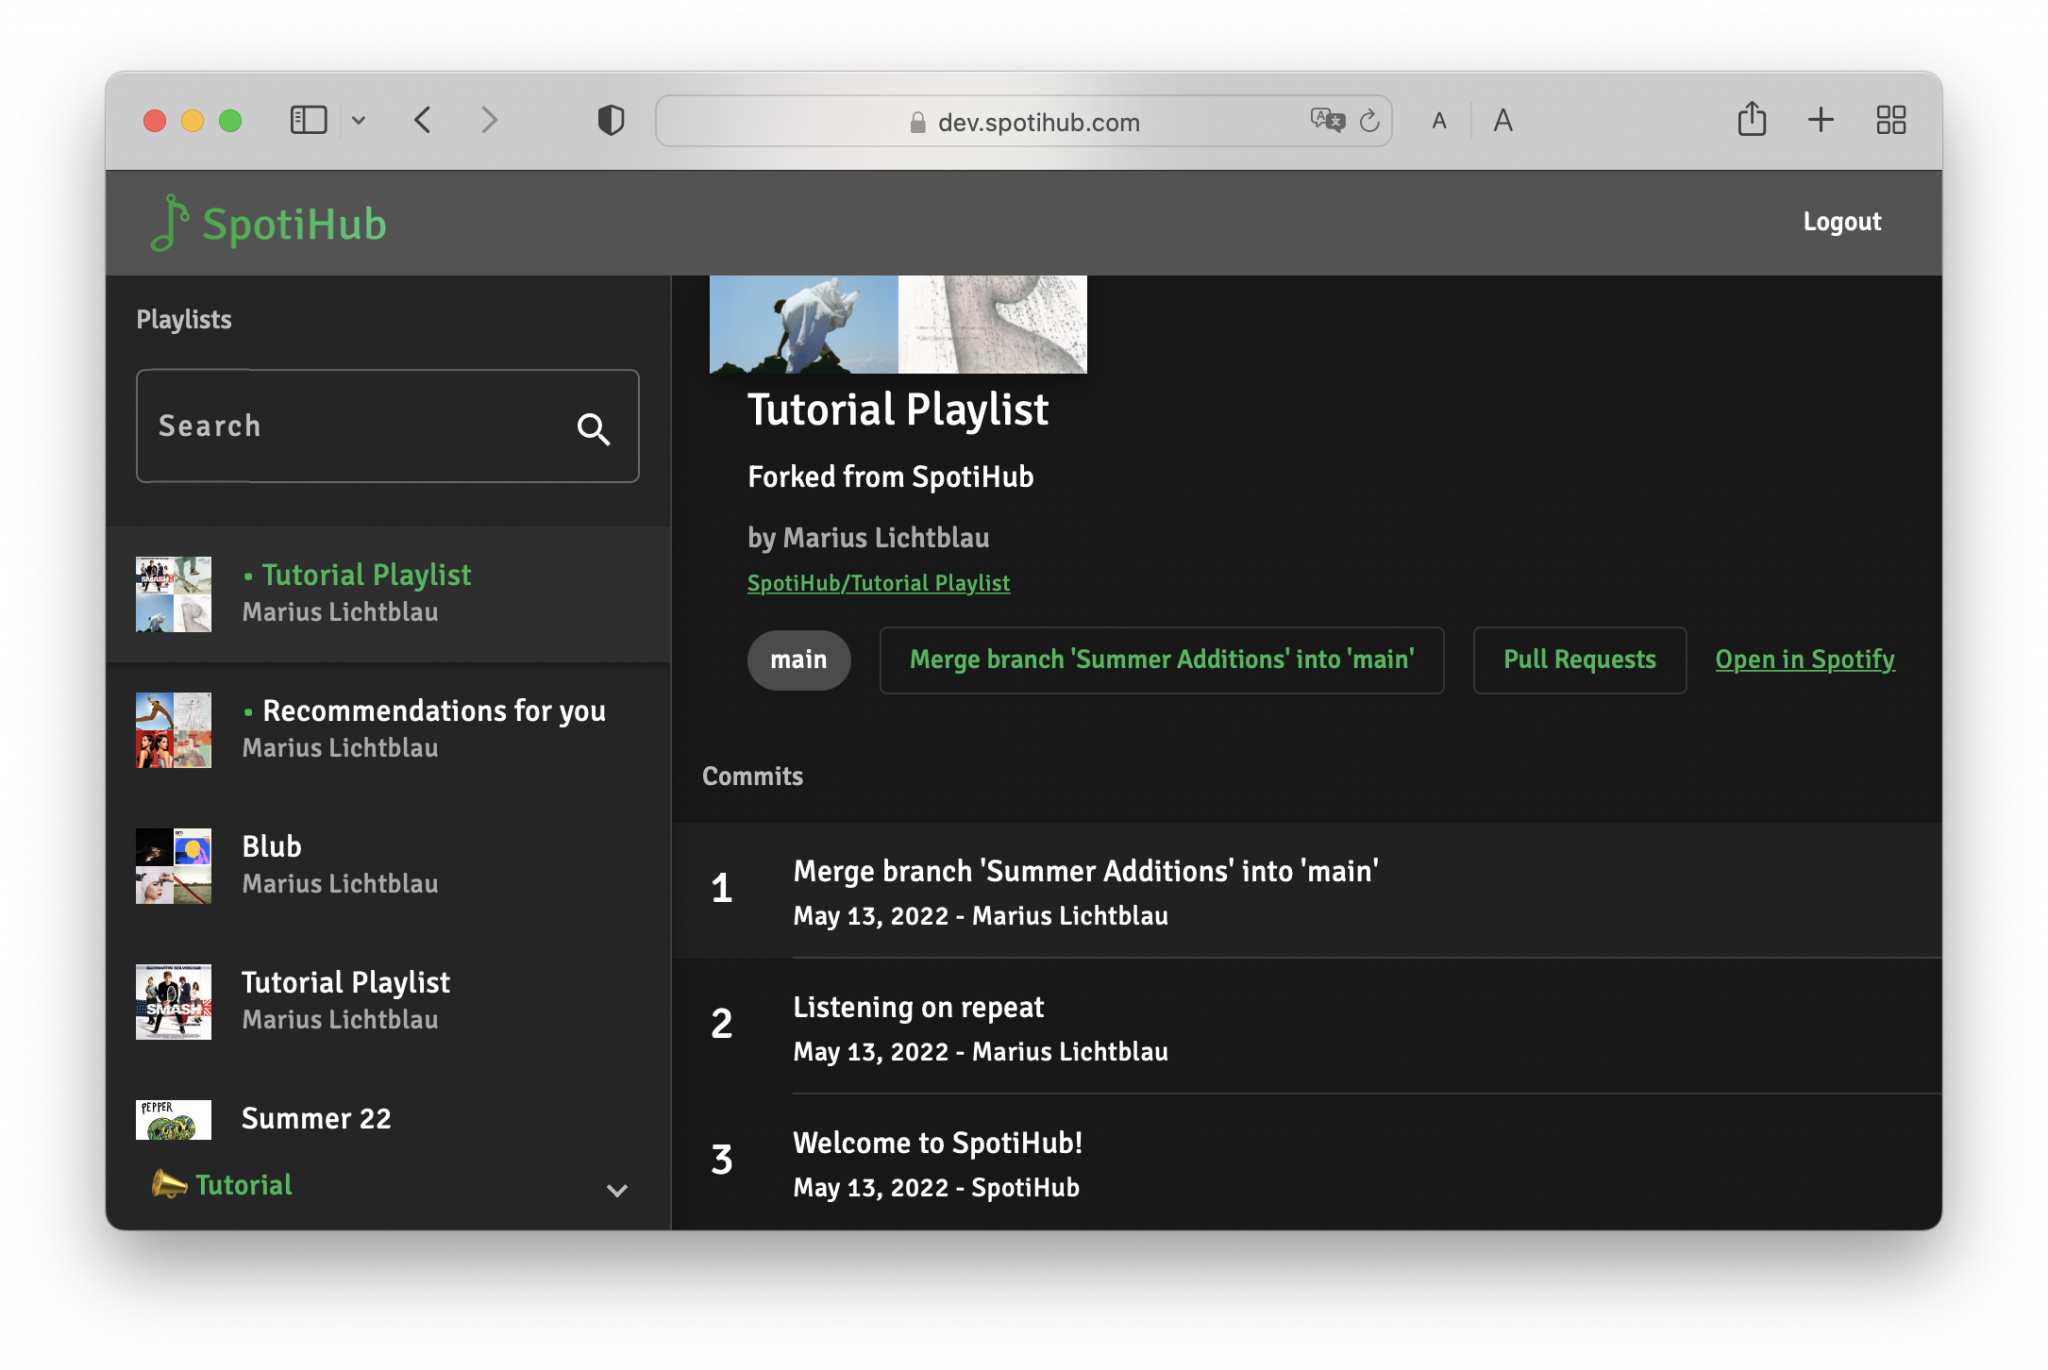
Once we’re happy with the result we merge the branch by clicking “Merge”. If we’re unhappy we can go back, switch to our branch, make changes to the playlist and create a new commit on top of the old commit. After we merged we will see a Merge Commit by the playlist description, which was created by SpotiHub. When we click on it we can see all the commits that have been created on this playlist.
Creating a Pull Request
Now we have all our updates on our main branch of our playlist. But how great would it be if the original creator could also benefit from our changes!
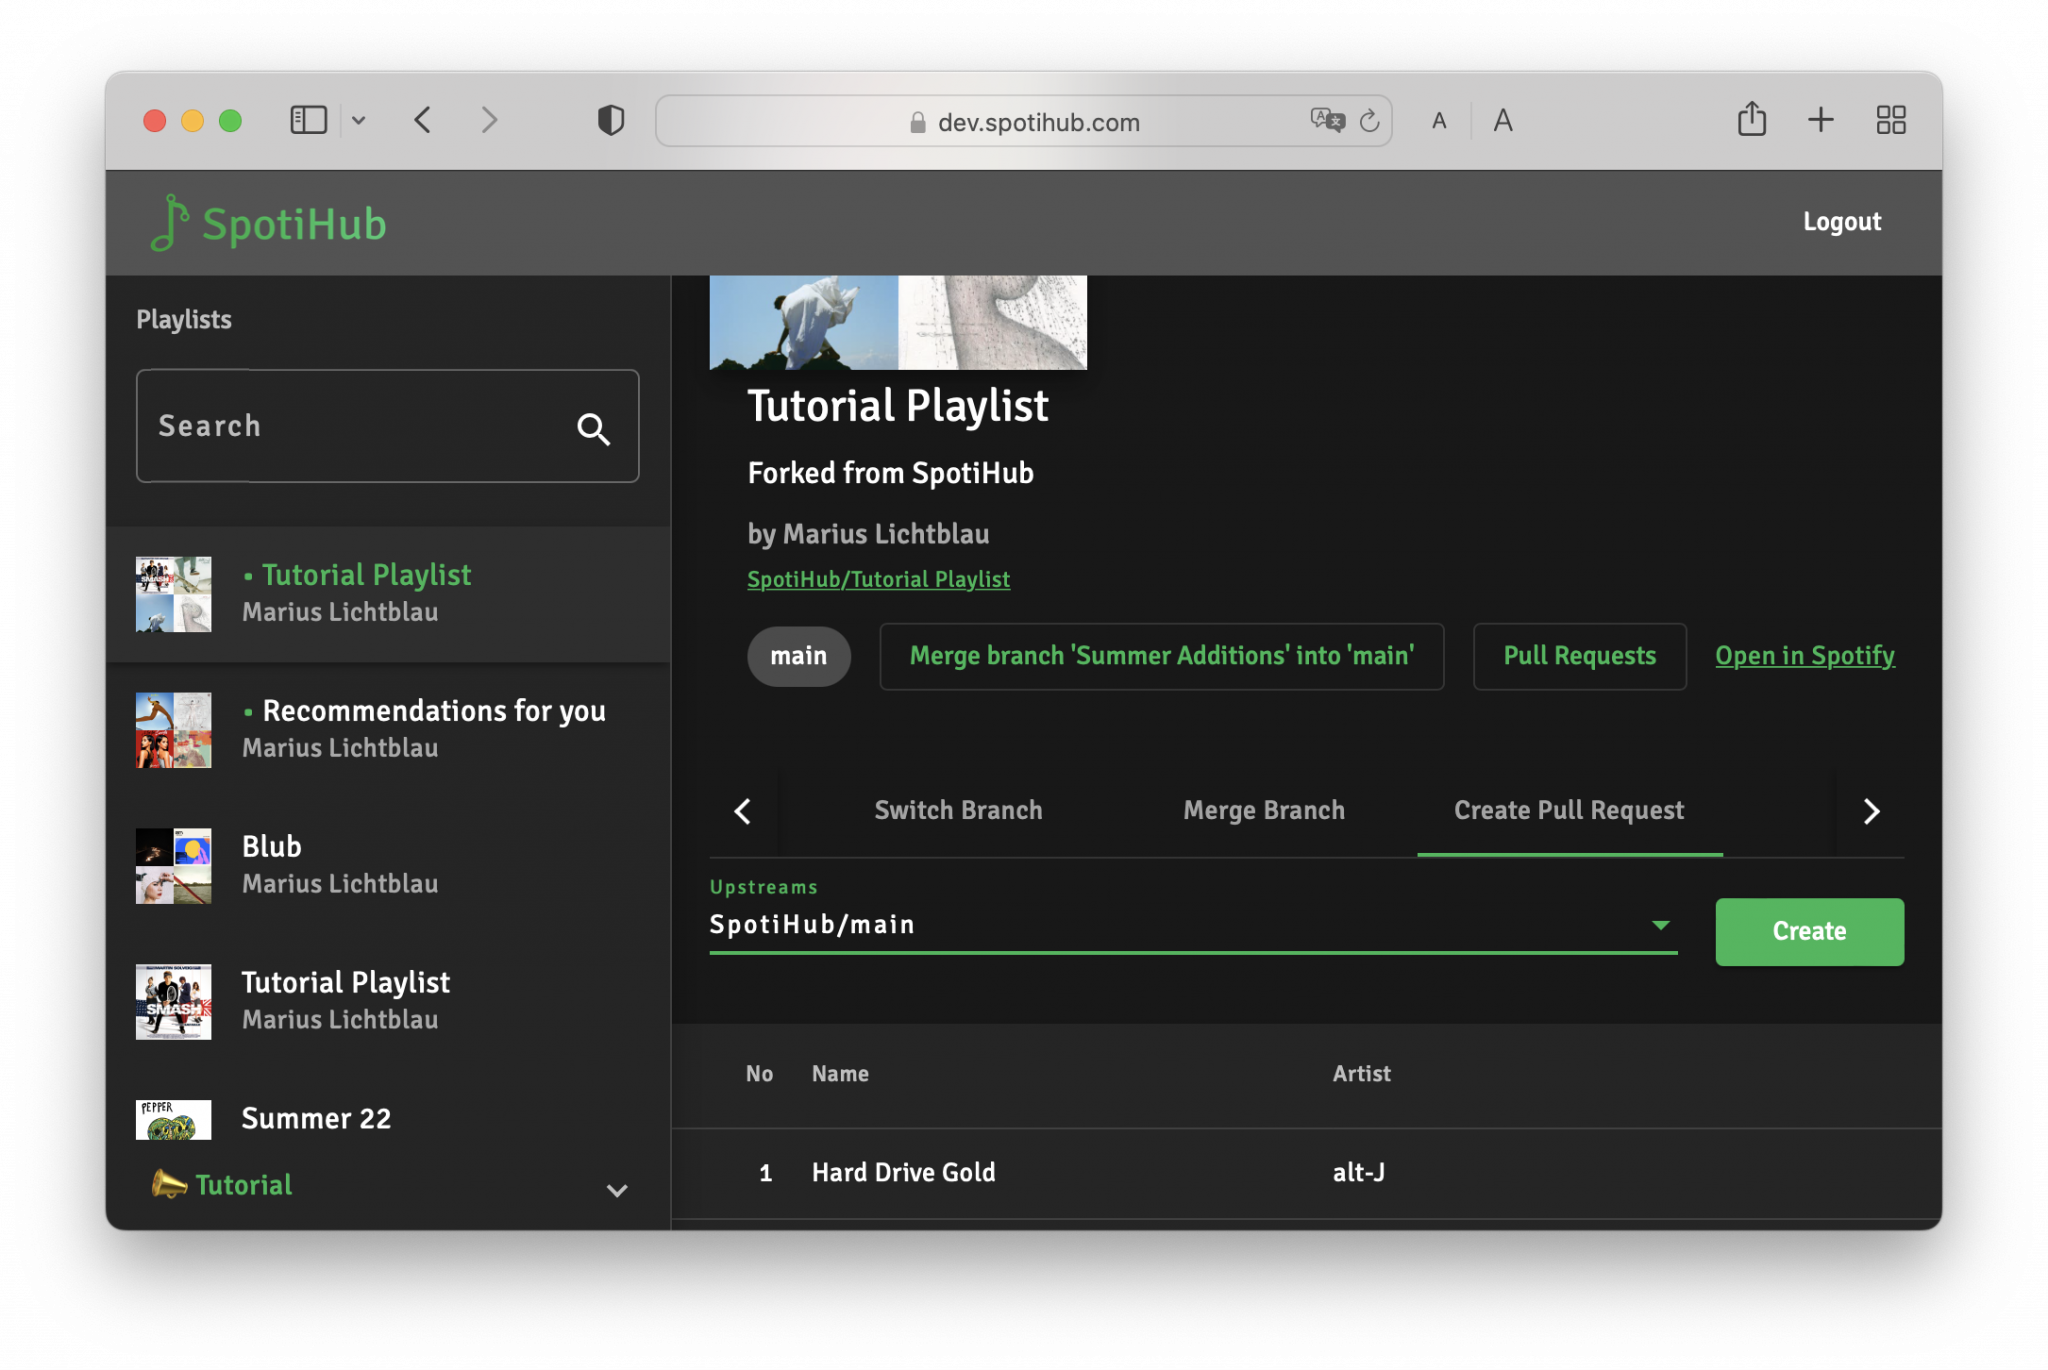
We can create a Pull Request to propose our changes to the original playlist creator, so he can decide to merge our changes to his own playlist.
We go to the “Create Pull Request” tab and select the “SpotiHub/main” branch.
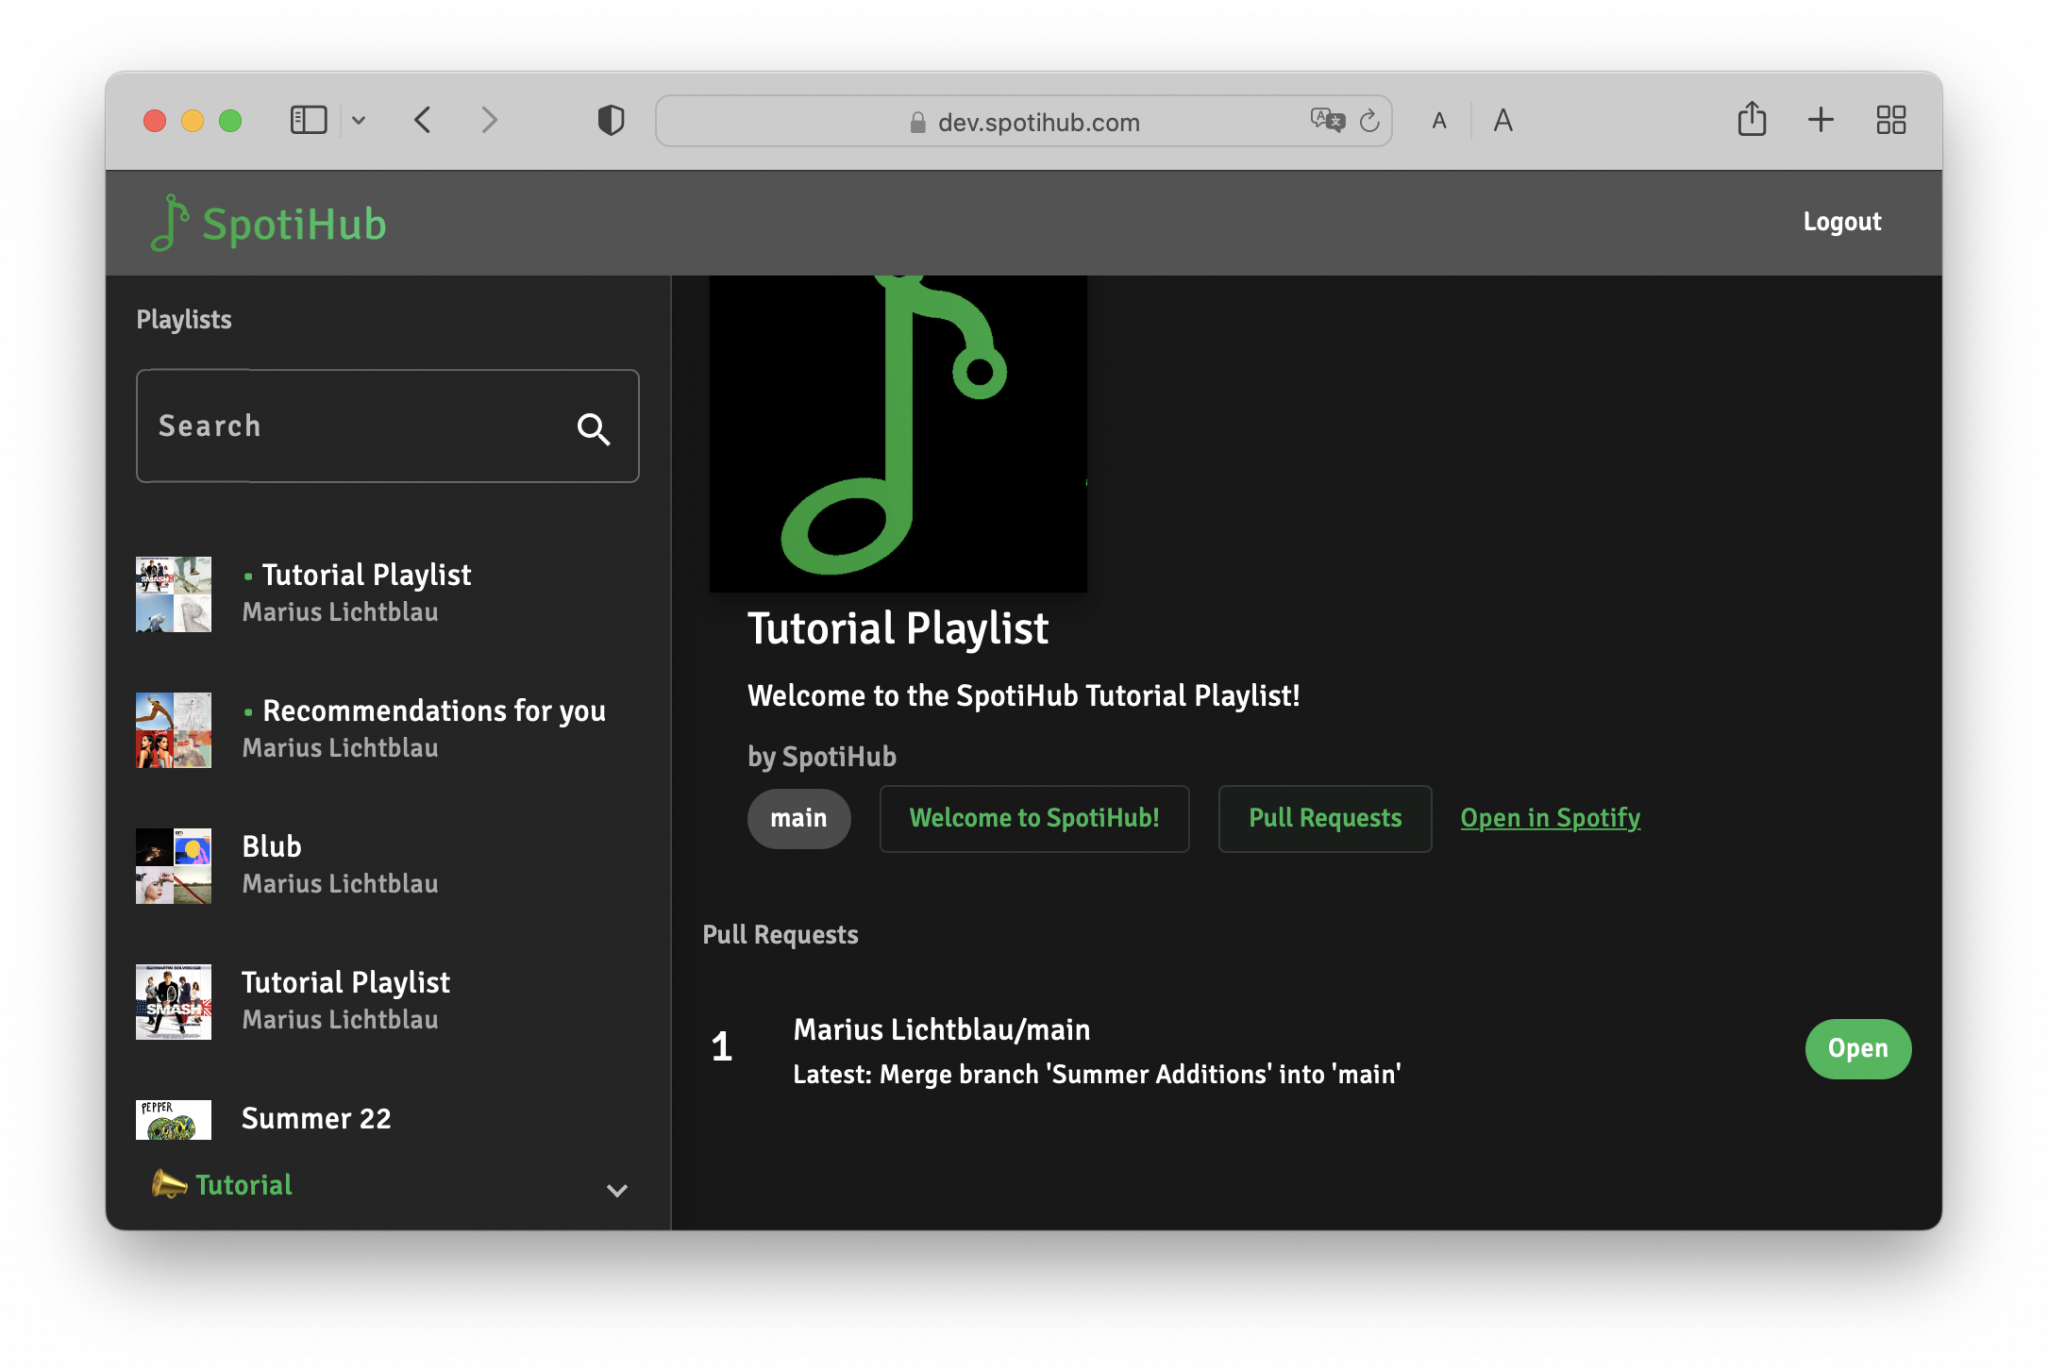
Now we only need to click “Create” and we can see that our Pull Request is in state open. Once the creator has merged the PR we will see our changes on his playlist.
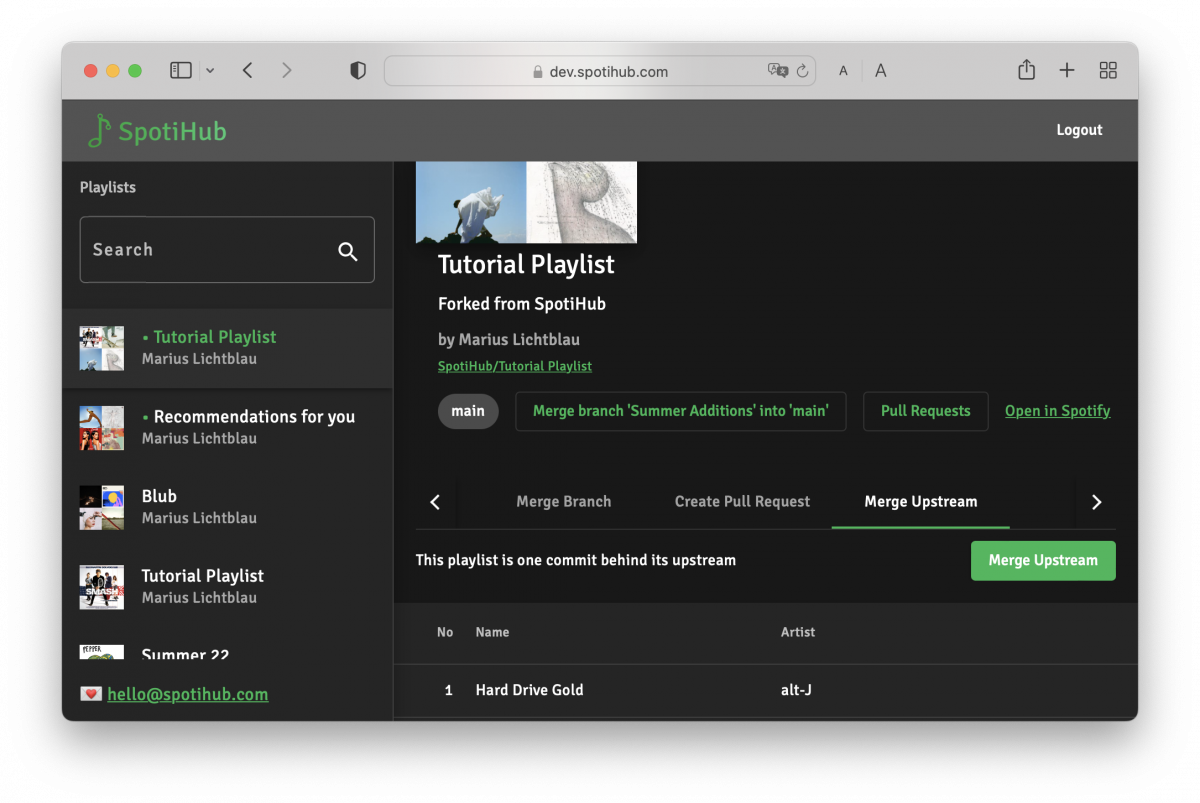
Merging the Upstream
One bonus feature, that is not covered by the interactive tutorial (yet) is the possibility to merge new changes of the original playlist into our fork. When the original creator adds new commits to his playlist a “Merge Upstream” tab will appear where you can merge his changes into your own fork.
Conclusion
Now it’s time to go back to SpotiHub to create more playlists! Checkout the Announcement Blog Post, if you haven’t already. If you have any questions or comments please reach out at hello@spotihub.com. For any bugs or issues please use issues@spotihub.com.